How to request help or user access for established websites:
The Geisel Web team provides training for programs/departments and labs that wish to make edits to their websites. You may request training by emailing Geisel.Webmaster@dartmouth.edu. We will work with you and/or your team by deciding on an ideal time. Once a time is established, a Zoom invite will be provided. This option is available as a refresher or for the new WordPress user. Please read through and become familiar with the Website Policy.
Requesting edits to the Webmasters:
Please email Geisel.Webmaster@dartmouth.edu. Within the context of the email (or subject line), please include the URL of the web page(s) requesting updating. This can be accomplished by highlighting the web address within the address bar on your web browser, selecting copy, and pasting the URL within the email.
Example:
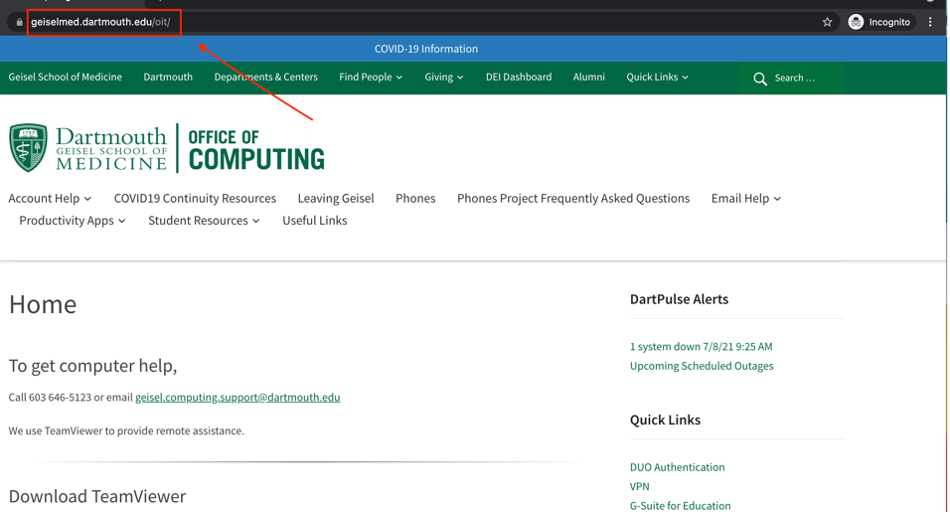
Please make edits to: https://geiselmed.dartmouth.edu/oit/
Please, also, include the list of edits as a separate attached word document or provide a shared link to a cloud-based document. As far as images, please send these as a separate attachment or add a link within the document as to where these images are stored. The maximum email capacity with attachments is 150 MB. Please provide all images in high resolution. Multiple high-resolution images may require uploading the images to a cloud-based shared drive.
Viewing documents on web pages and posts
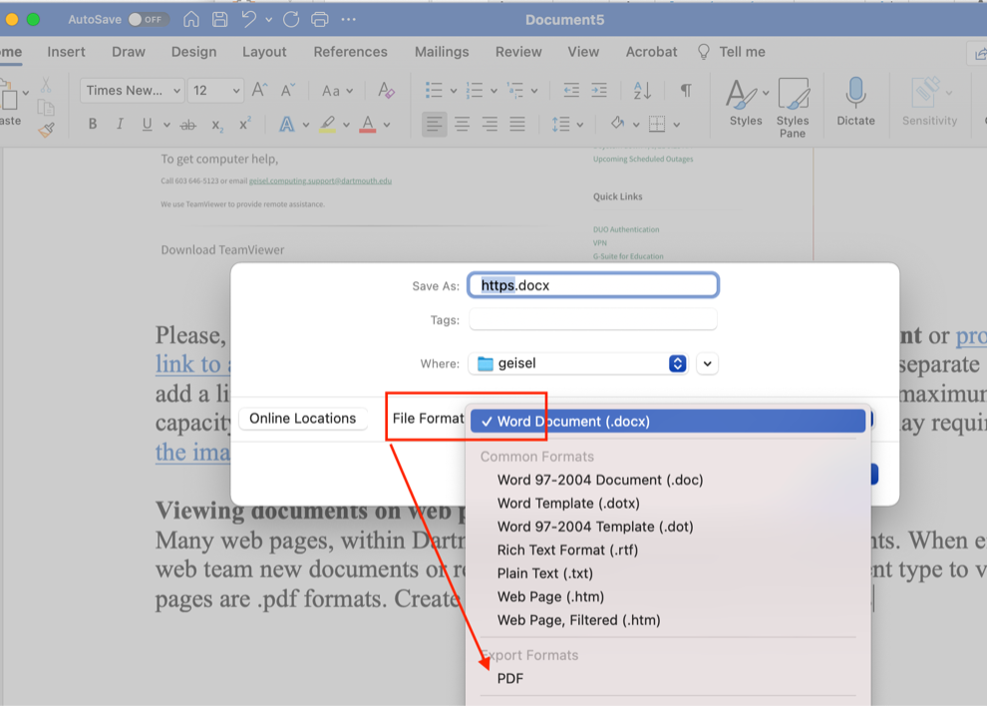
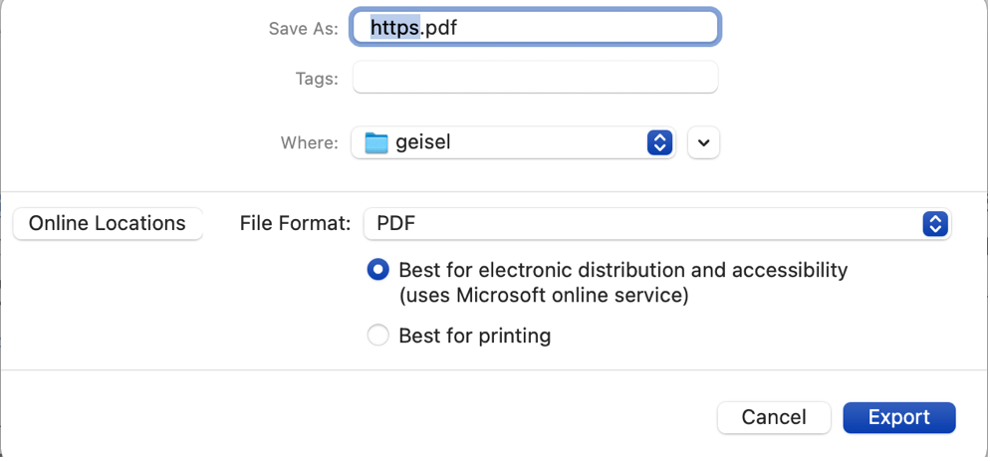
Many web pages, within the Geisel School of Medicine, contain links to documents. When emailing the web team new documents or replacement documents, the best document type to view on web pages are .pdf formats. Create the document in MS Word and Save As PDF. Select, “Best for electronic distribution and accessibility”.
In some instances, Word Documents are named prior to exporting to a PDF. If the name is not changed or deleted, it will carry over to the new format. The name will appear at the top of the tab when the user opens the document. To change or delete the name of the document, open the document either in Word or PDF format. Select File, then Properties. In Word, the title will live under Summary; while in the PDF, it will display under Description. If you delete the name of the document, the tab will display the file name the document is saved as. Otherwise, add or change the title name in these destinations. Remember to save the document after these changes are made.
Media Uploads
You may upload most forms of media to your WordPress website. However, as a site editor, please follow these guidelines:
- In regard to using media on your WordPress site, please follow Dartmouth's Copyright Policies and Guidelines. If you need approved images for your site, please contact Geisel Communications.
- Images should be optimized. Large high-resolution images should be between 60 and 100K and for smaller images 30K and lower. You can read more about WordPress image guidelines, here.
Images must have text alternatives that describe the information or function they represent per ADA requirements.
Images need to have an “alt” tag. WordPress automatically uses the file name as the alt tag when an image is uploaded and an alt description is not added. An alt tag is a description of the image and is used for multiple reasons. ADA requires all images to have alt tags; this is how specific software communicates details for the visually impaired. Alt tags are also used when browsers are not accessing the image. Instead, the text will appear in its place. Lastly, alt tags help with Search Engine Optimization (SEO). This is because the text within the tag is scanned by trackers on the web.
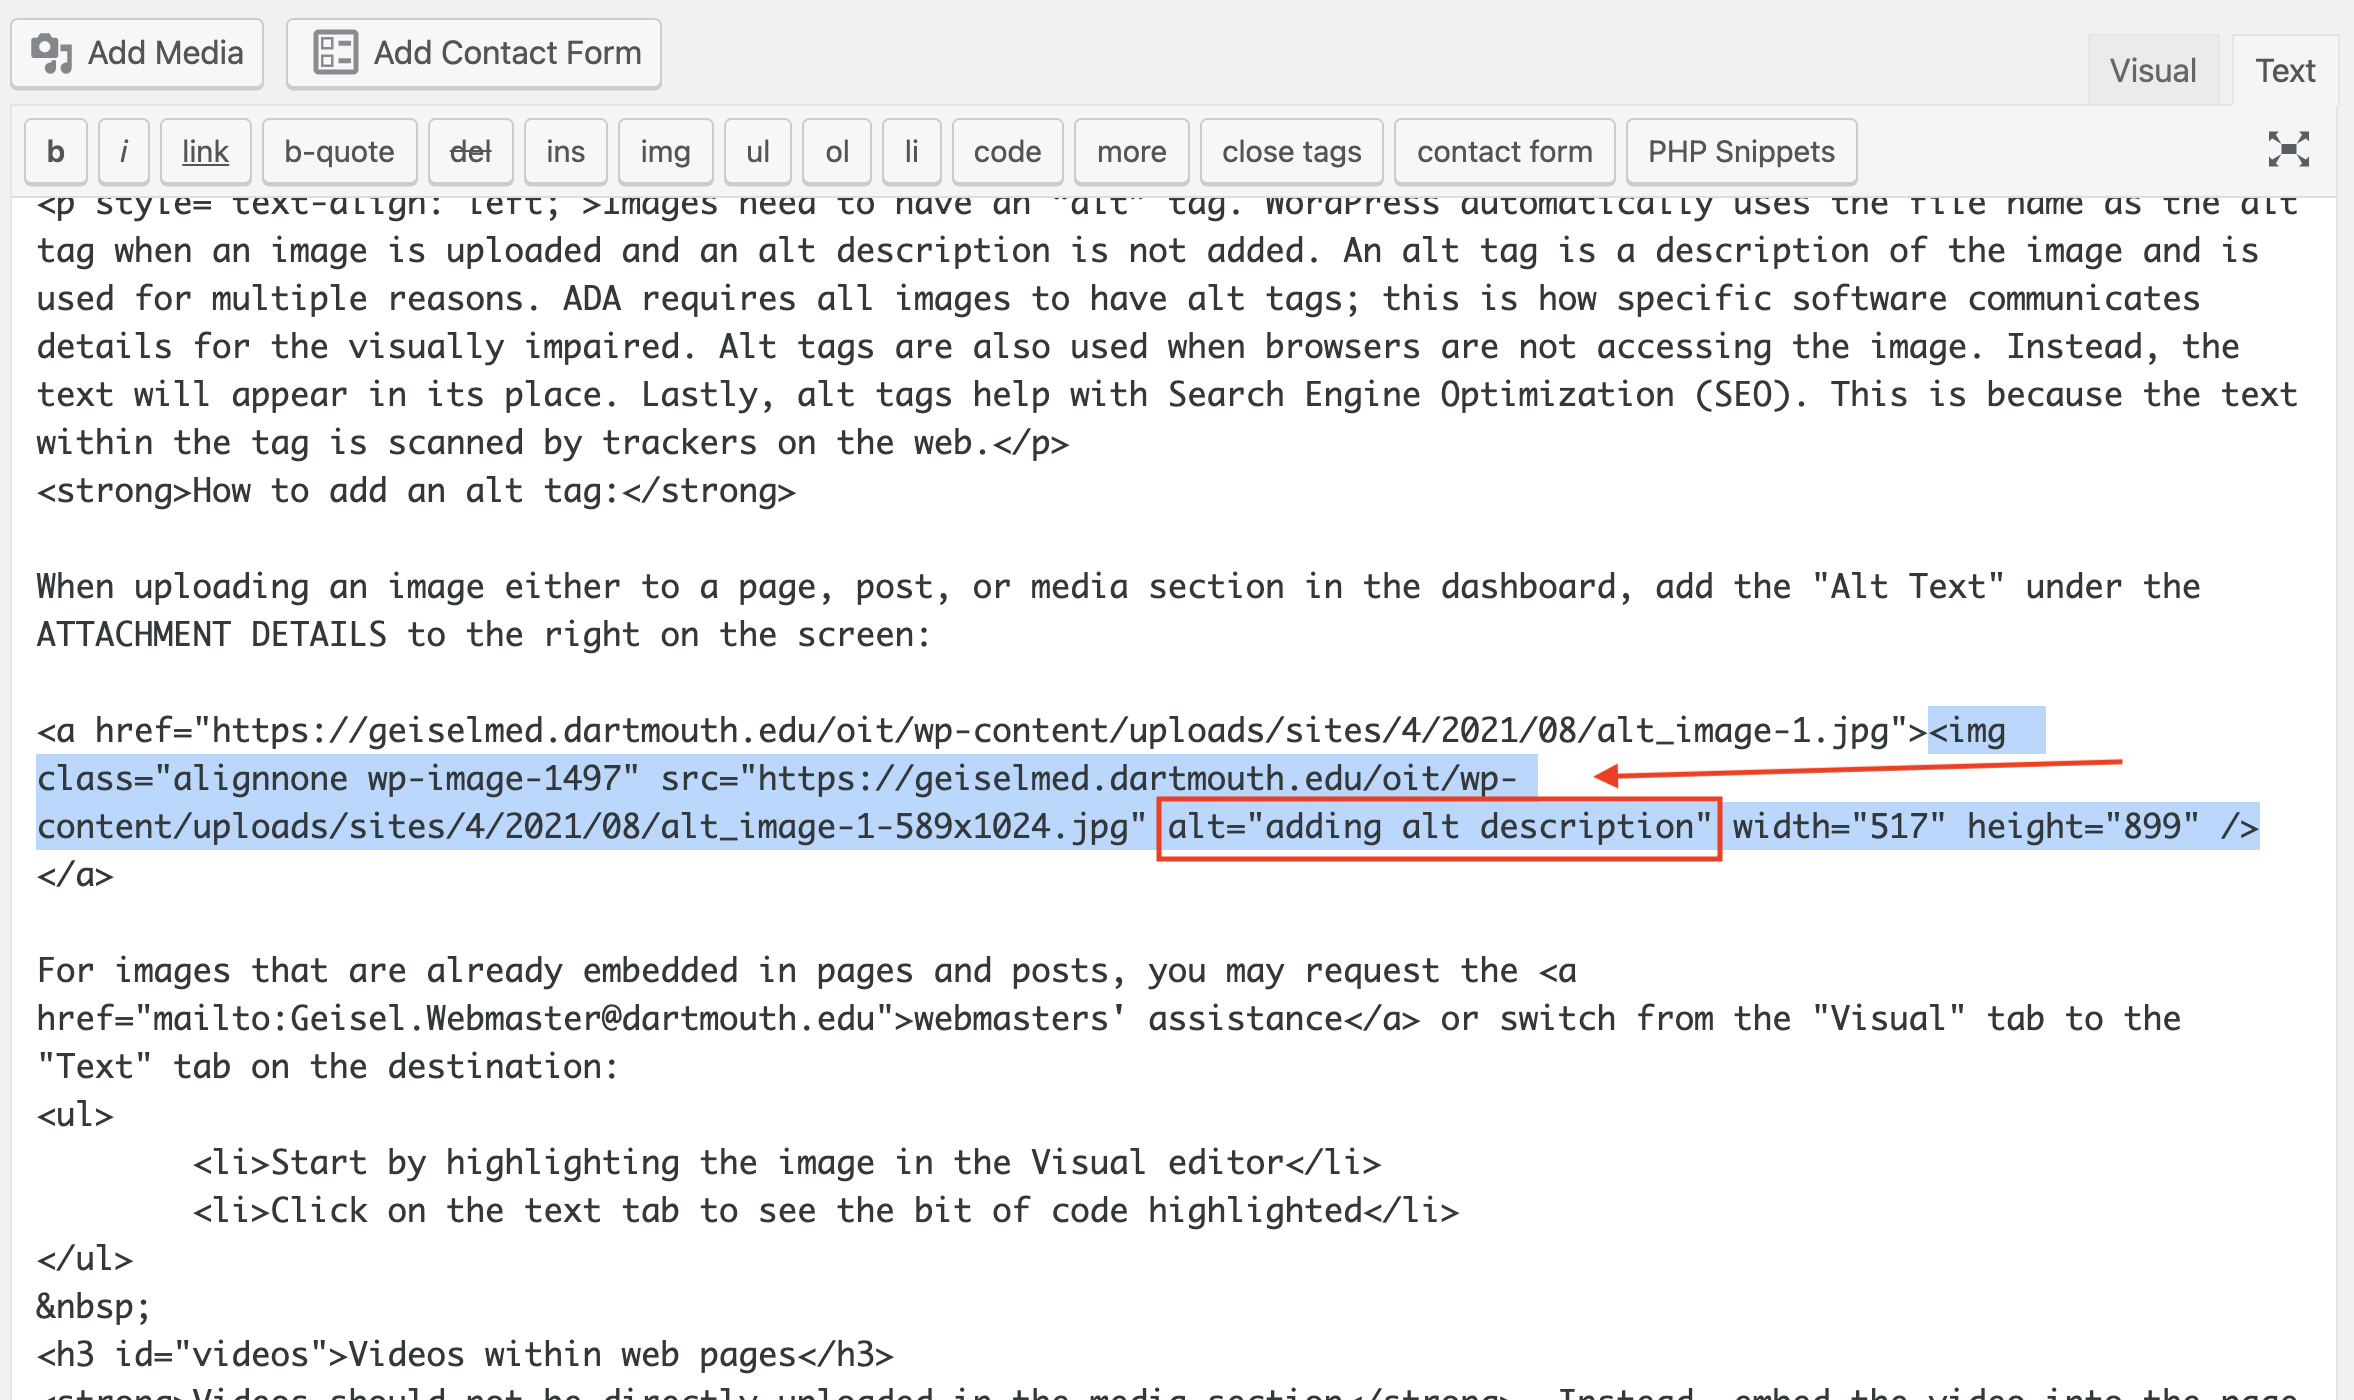
How to add an alt tag:
When uploading an image either to a page, post, or media section in the dashboard, add the "Alt Text" under the ATTACHMENT DETAILS to the right of the screen:

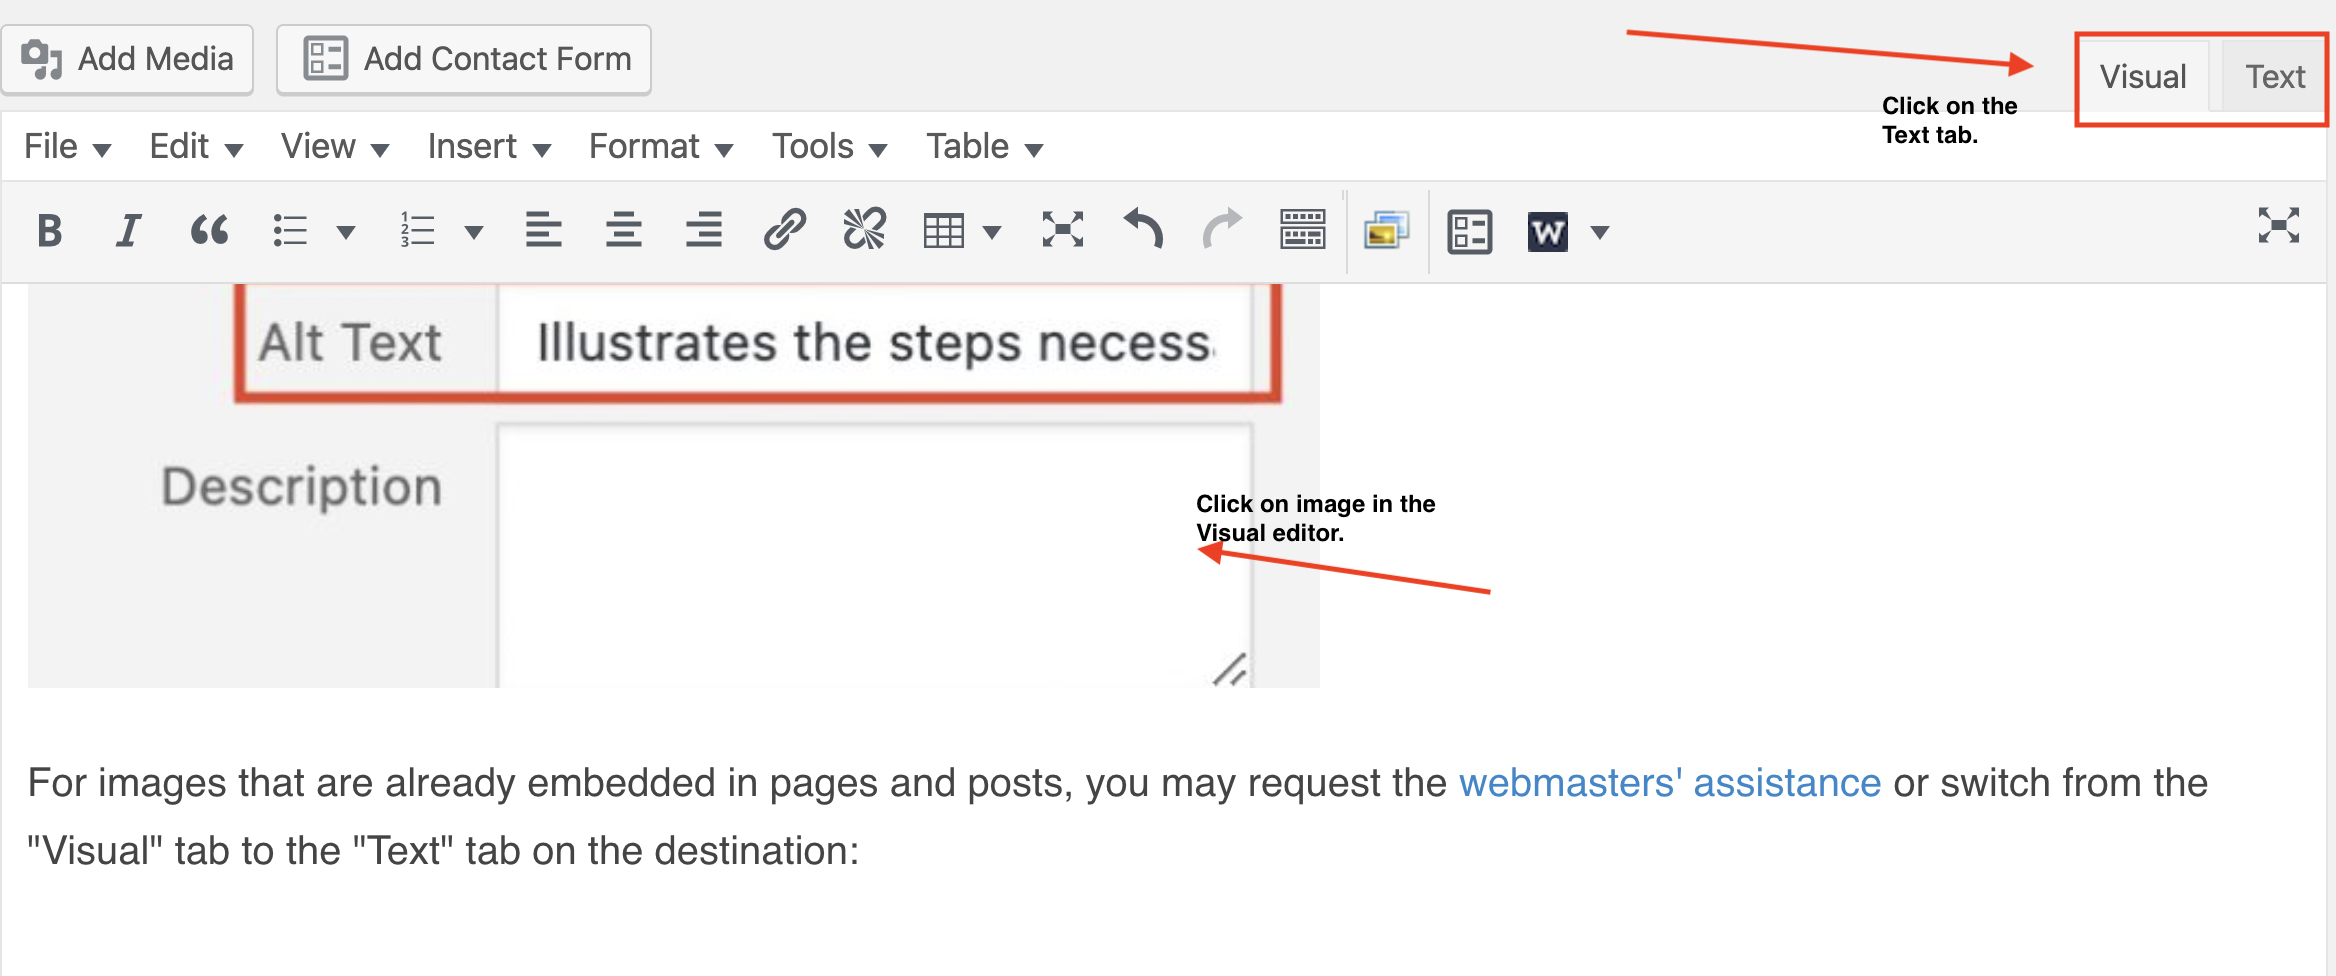
For images that are already embedded in pages and posts, you may request the webmasters' assistance or switch from the "Visual" tab to the "Text" tab on the destination:
- Start by highlighting the image in the Visual editor
- Click on the Text tab to see the bit of code highlighted in the Text editor
- Under the quotation marks, an alt=" " will be visible
- Add the description within the quotation marks after alt=
Videos within web pages
Videos should not be directly uploaded in the media section. Instead, embed the video into the page or post. Learn more about why and how to embed videos, here.
There are many ways to embed videos within web pages. Videos can be labeled and opened up, similarly to documents, within a link. Alternatively, videos can be showcased with a thumbnail image and viewed by pressing play.
There are a wide variety of platforms that videos can be stored and shared. The Geisel Web team recommends Panopto™. There are many options within the platform to share and view videos. We invite you to visit the website https://dartmouth.hosted.panopto.com/ and sign in using your Dartmouth credentials. From here, you will be able to set up an account for your team and share links with the Geisel Web team or embed the videos yourselves. There are a multitude of How To video tutorials that will answer any questions you may have about the platform.