Calendars for Geisel’s M1 and M2 courses can be found in OASIS. You can Export the calendar and sync it in BWA, Google, or Apple Calendar. The following are instructions on how to
- Acquire the Calendar URLs using the Export function in OASIS
- Sync the OASIS calendar with other email services.
Step I: Acquiring the Calendar URLs
- Log in to https://geisel-oasis.dartmouth.edu/index.html.
- Select the current year.
- From the Calendar tab, select Export.
- In the Export window, select the Calendaring Application you want to sync.
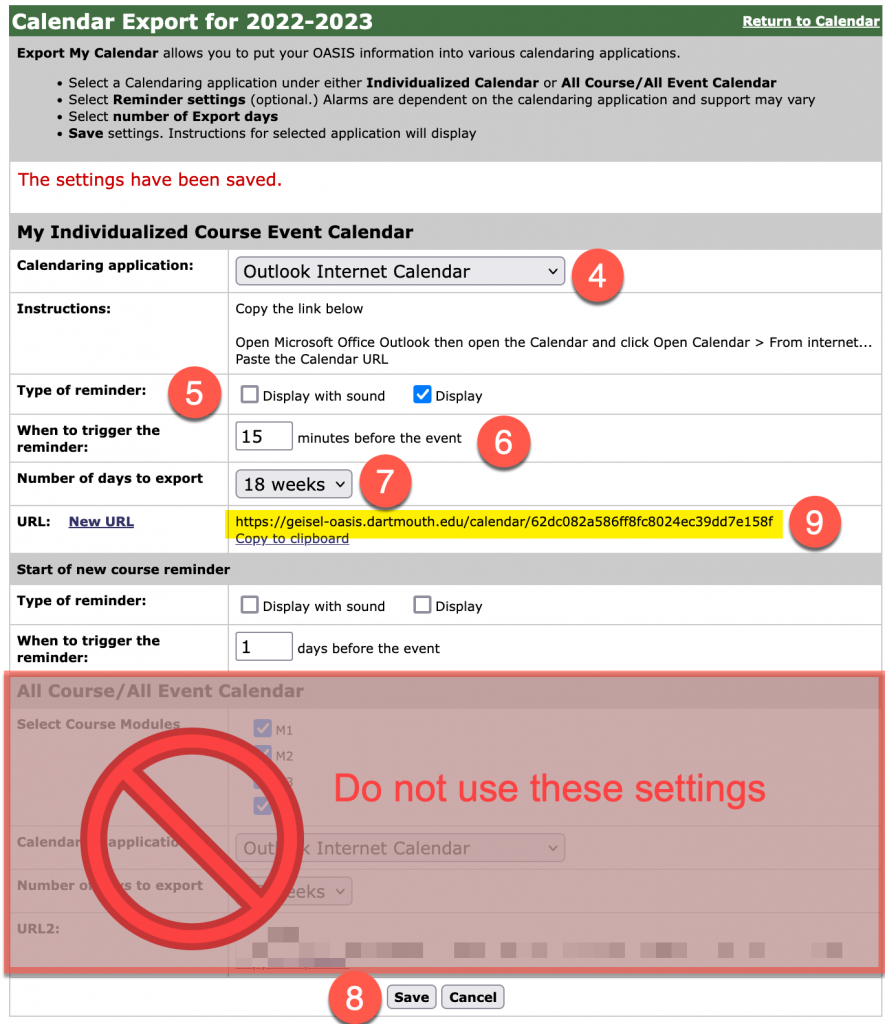
- Select a reminder type (optional).
- Set the reminder trigger time (optional).
- Set the number of days to export to 18 weeks.
Note: This means that you will be able to see 18 weeks ahead on the schedule and it will update throughout the term. - Click [Save].
- Once saved, the URL will appear for the calendar you selected.
Copy this URL and proceed to Step II.

Step II: Adding the URL to an External Calendar
iCal for iPad
- Complete Step 1 instructions above.
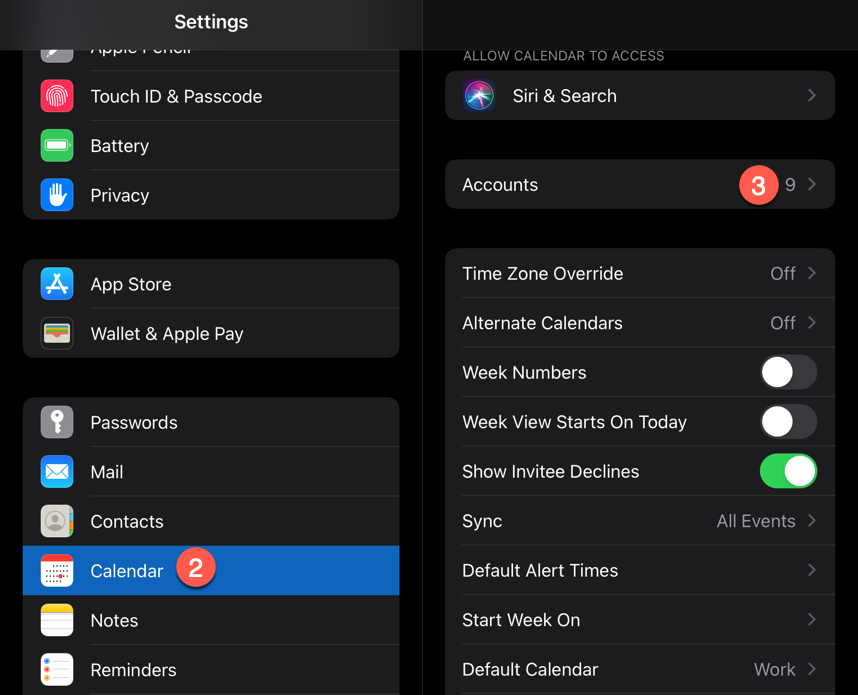
- On the iPad go to Settings > Calendar.
- Select Accounts.
- Select Add Account.
- From the resulting options, select Other.
- Under Calendars, select Add Subscribed Calendar.
- Paste the URL in the Server field.
- Select Next.
- On the next screen, select Save.
Option 2: If you are adding the URL to the iPad calendar, open OASIS in an iPad browser (Chrome or Safari) and follow Step 1 instructions. Copy the URL and Paste it into a new browser tab. Do not select Paste and Go. Change the https to webcal, then click return. When prompted to Open this page in "Calendar"? select Open. Follow any additional prompts.
Google Calendar
- Log in to Gmail and view the Calendar.
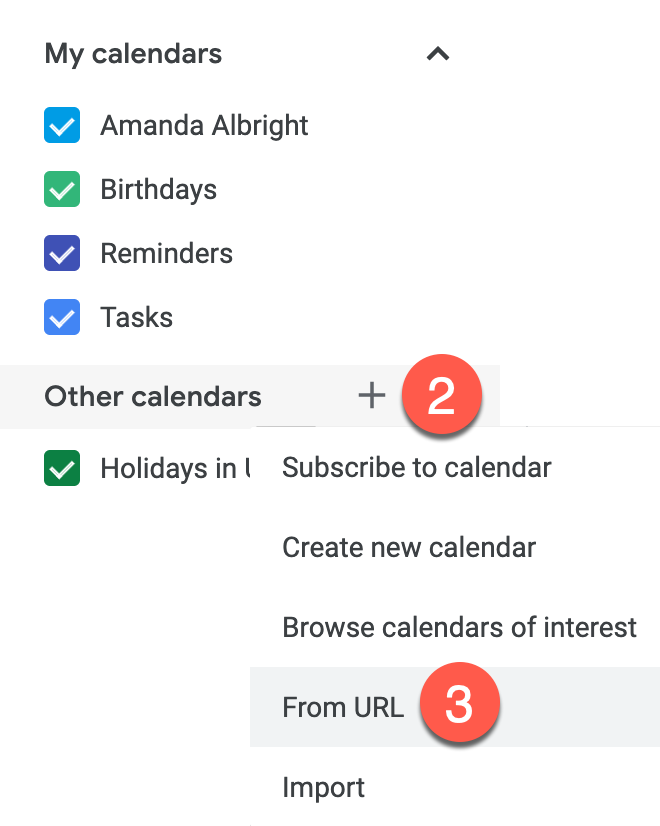
- Click + to the right of Other Calendars.
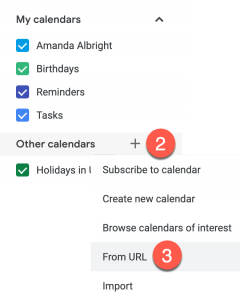
- Select Add by URL.
- Paste the URL into the resulting field.
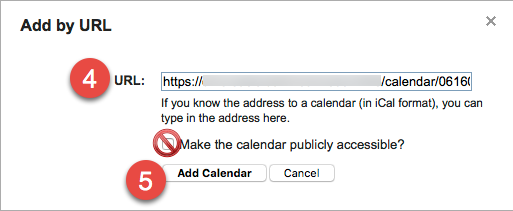
- Click Add Calendar.
Note: The Make the calendar publicly accessible option is NOT recommended.
BWA Calendar
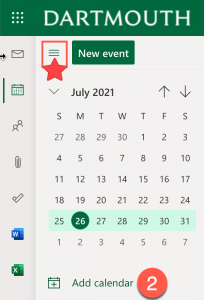
- Log in to BWA and view the Calendar.
- Click the Add Calendar button.
Note: You may need to click the hamburger icon to reveal the calendar and Add Calendar button.
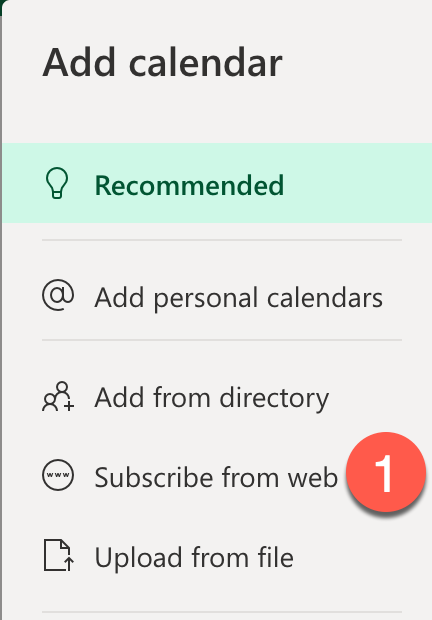
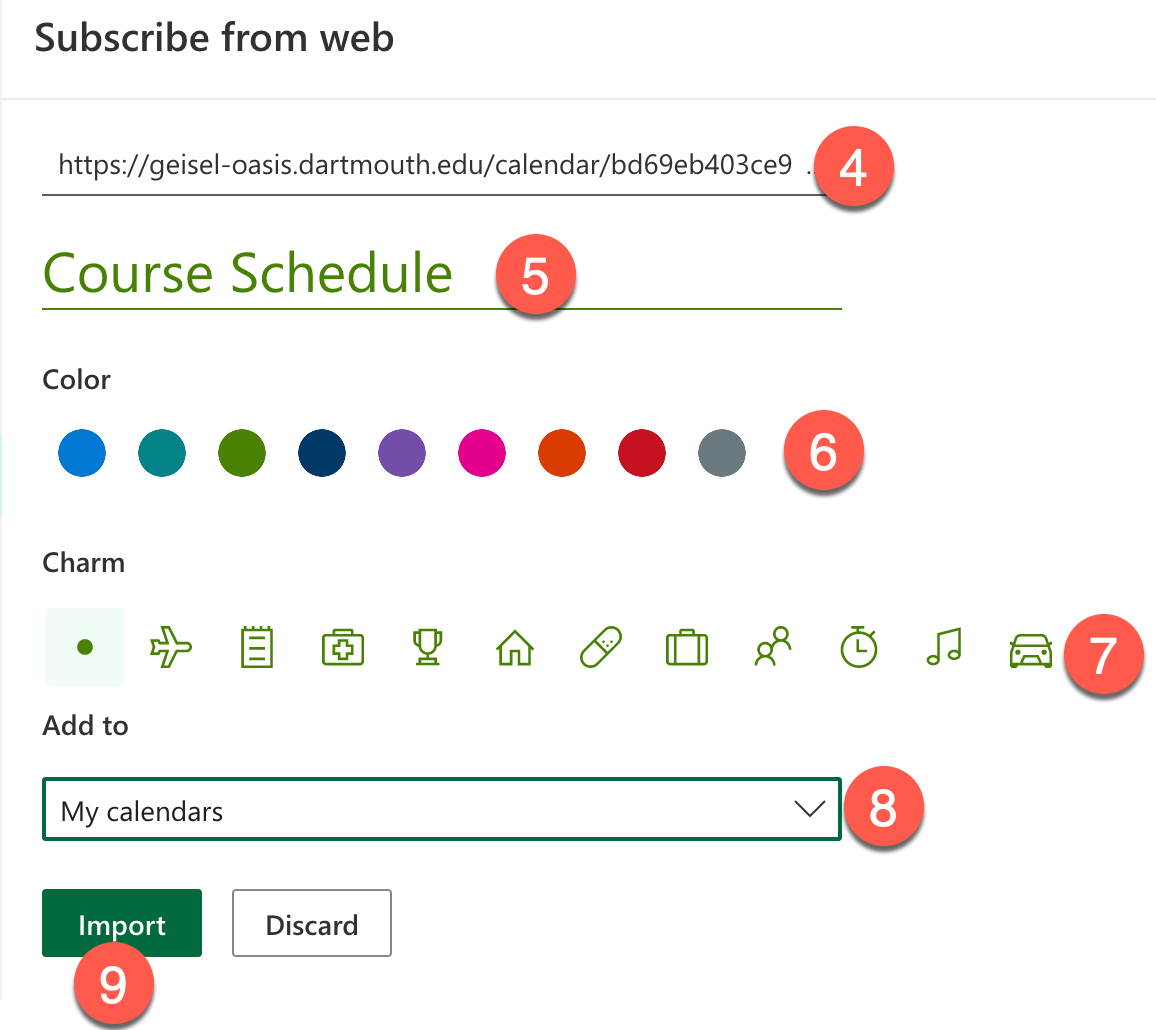
- From the resulting menu, select Subscribe from web.

- In the prompt, paste the URL derived from OASIS into the URL field.

- Give the calendar a name. I.E. Course Schedule.
- Select a calendar color.
- Select a calendar icon.
- Under Add to, select My Calendars.
- Click [Import].