OneDrive is a cloud storage solution available to Dartmouth students, Dartmouth staff, and Dartmouth-paid faculty. OneDrive allows users to easily store and share up to 1 terabyte of photos, videos, and documents. And the best part is that you can access these files anywhere, on any device. This includes integration with the iPad via various apps.
This webpage outlines the process for setting up your OneDrive account as well as some of the apps that interface with OneDrive.
- Accessing OneDrive from BWA
- Navigating OneDrive from a Mac/PC
- Saving Files to OneDrive from Notability
- Saving Files to OneDrive from Google Drive
- Saving Files to OneDrive from Dropbox
For additional assistance, please contact Geisel.Computing.Support@dartmouth.edu or call 603-646-5123. You can also visit us in person in Vail 814.
Accessing OneDrive from BWA
To set up your OneDrive account:
- Log in to https://bwa.dartmouth.edu.
Note: This process cannot be accomplished via the iPad at this time.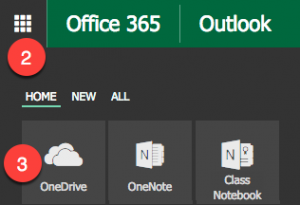
- Once logged in, click the Office 365 app launcher at the top left of the page.
- From the resulting list, select OneDrive.
- This will create your OneDrive.
Your OneDrive @ Dartmouth College Documents area should open.
Navigating OneDrive in a Browser (Mac/PC)
Within OneDrive you will notice a few panels, tabs, and options.
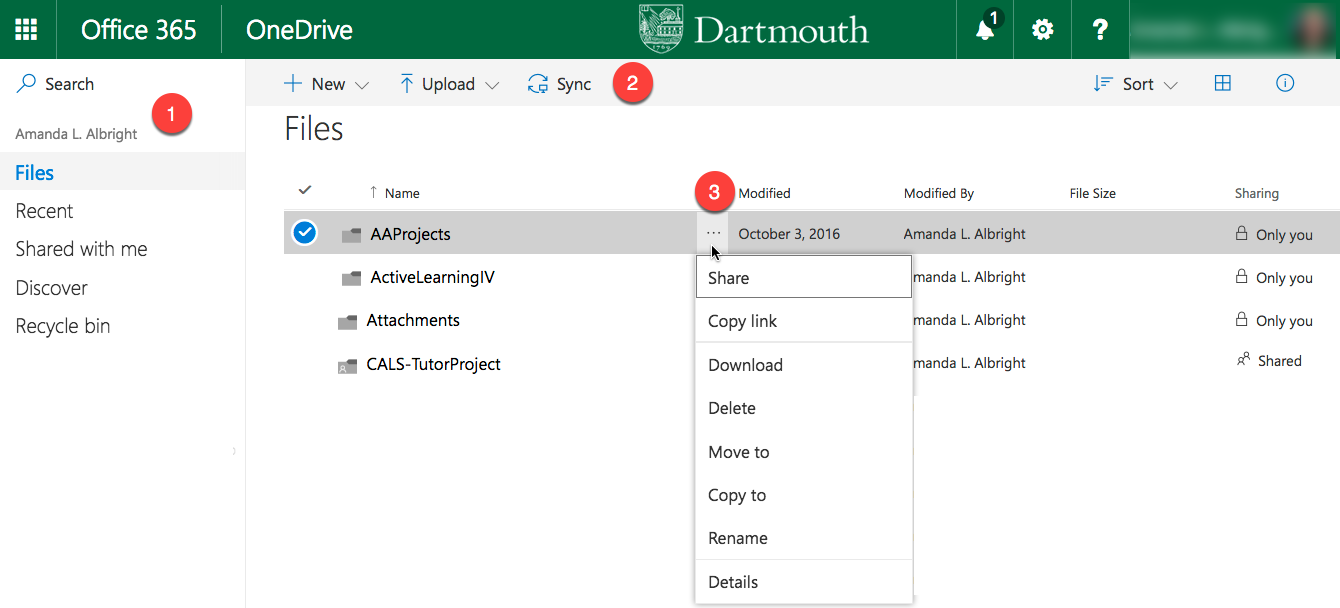
- The left navigation provides you with access to your files based on specific characteristics
- Recent
- Shared with Me
- Discover
- Recycle Bin
- The center panel will change depending on which document area you are in. The default navigation options include:
- New (Create new folder/file)
- Upload
- Sync (used for various device connections)
- Selecting the radio button or the the triple dots … next to files and folders provide additional contextual action menus including:
- Share
- Copy Link
- Download
- Delete
- Move to
- Copy to
- Rename
- Details
Saving files to OneDrive From Notability:
- With the file you wish to share open, select the Share icon.
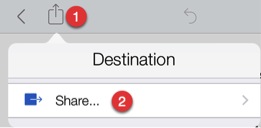
- From the Destination window, select Other Apps.
- In the Other Apps prompt, choose the format you wish to share the file.
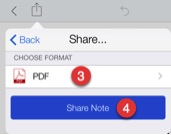
- PDF (options include PDF, RTF, Note)
- Paper
- Recordings
- Page Range
- Tap Share Note.
- From the apps list, select OneDrive.
- At the bottom of the resulting page, select Upload to OneDrive.
💡 Important Note: You can set Notability to automatically back up to OneDrive or Google Drive. This is highly recommended to ensure your files are backed up in the event your iPad is damaged or runs out of storage space.
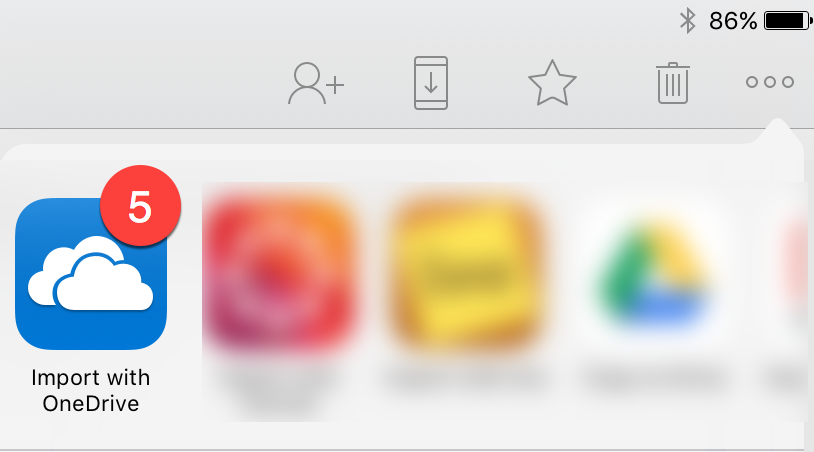
Saving files to OneDrive From Google Drive:
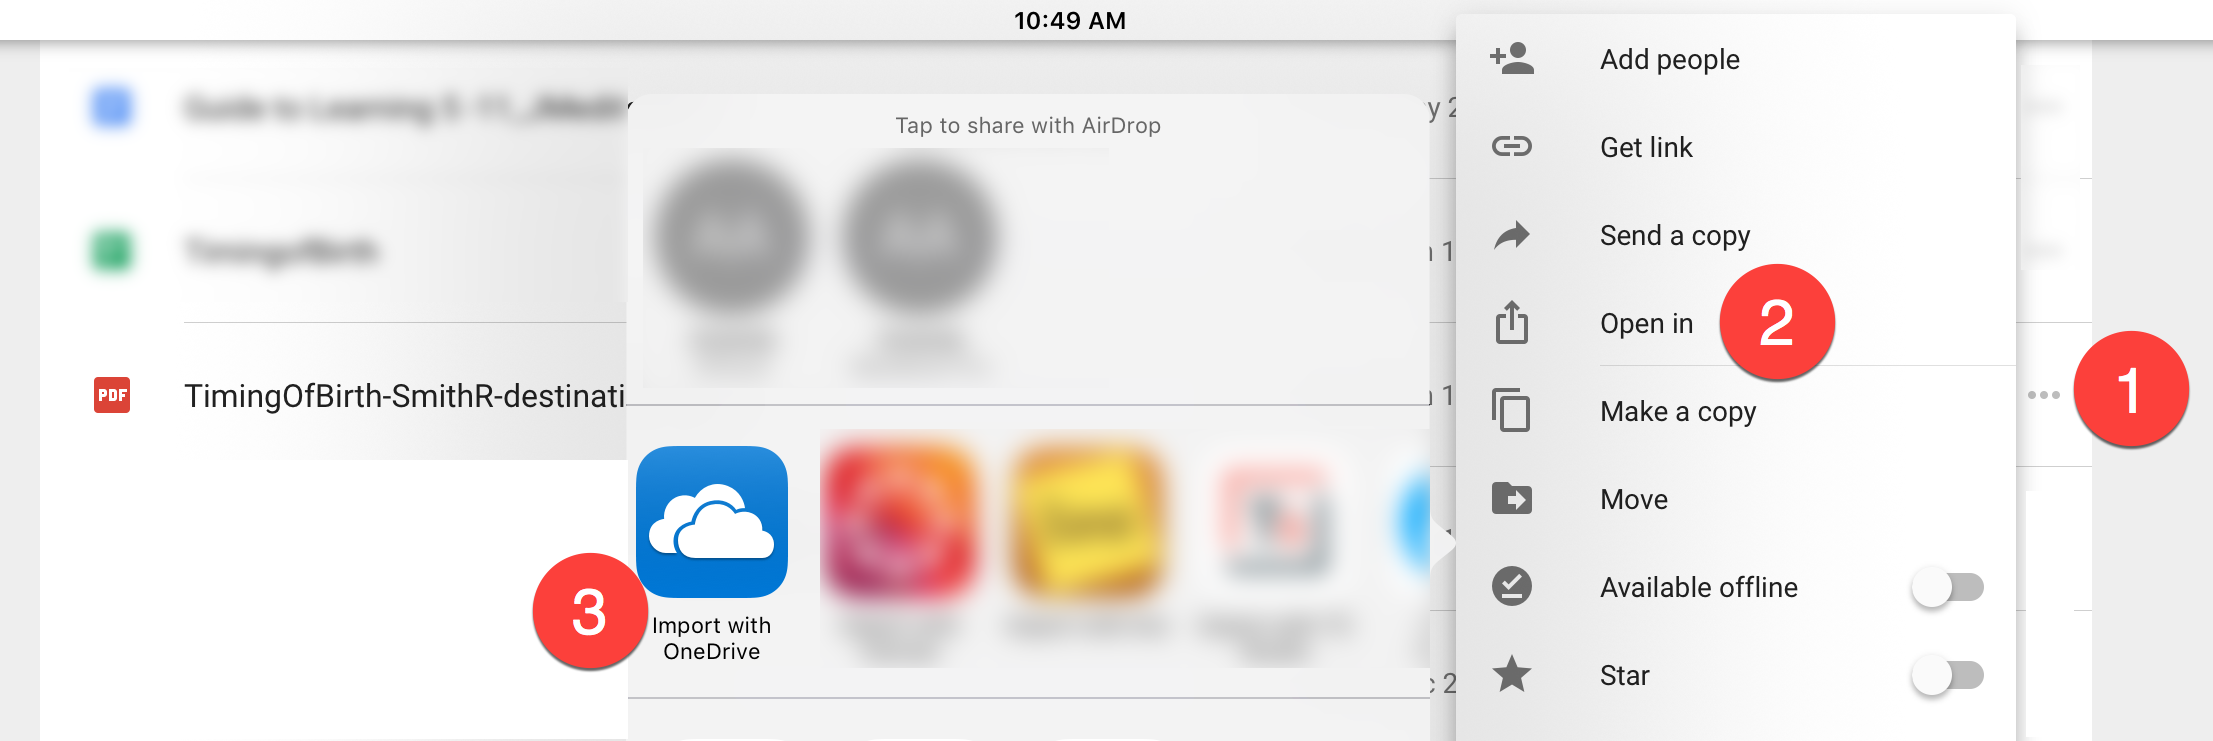
- Click the ... icon at the far right of the document you wish to move to OneDrive.

- From the Details panel, select Open In…
- In the resulting window, select Import with OneDrive.
- Navigate to the folder within OneDrive where you wish to save the file.
- At the bottom of the resulting page, select Upload to OneDrive.
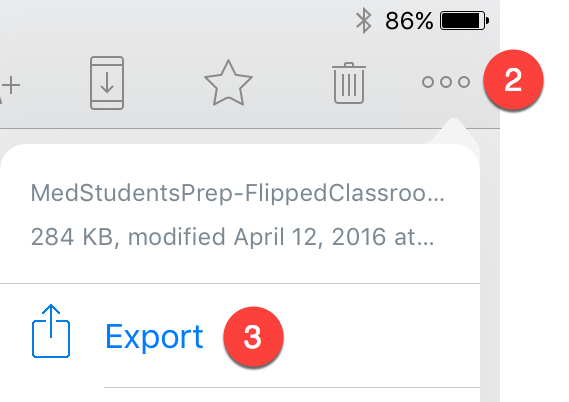
Saving Files to OneDrive From Dropbox:
- Select and preview the file you wish to move to OneDrive.
- Select the ... icon at the top right of the page.
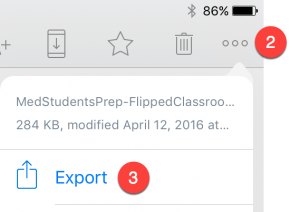
- Select Export from the resulting menu.
- Select the Open In icon.
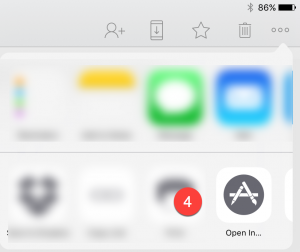
- From the apps list, select OneDrive.
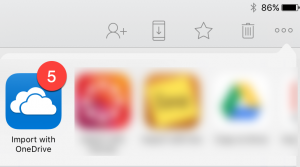
- At the bottom of the resulting page, select Upload to OneDrive.